Wire-Framed Potluck Totes Pattern - Tips and Tricks
Here are some tips and tricks to help you as you sew your wire-framed tote.
Notes in red are future pattern clarifications I will be making. You may want to note them directly in your pattern. Click here to print them out.
Note: This pattern has a skill level of Intermediate.
Before you begin...
Accurate cutting and measuring are important for this pattern. Things will go a lot smoother if you are careful about your cut dimensions, seam allowance (that accurate 1/4"). Use pins to keep things from shifting and lined up.
Remember... this needs to fit on the frame at the end. A little bigger is fine. Too small is too small.
Fat Quarter - you will need up to 21" of usable fabric.
If using a strong directional fabric see page 11 before you cut anything. Strong Directional = words, people, animals, etc. that are all the same direction.
I recommend pre-washing fabrics if you intend to wash the tote.
Wind a bobbin to match all 3 fabrics before you begin.
Pattern Change (9/2019): I am increasing the length of the top bands by 1/4" so the tote will go on the frame easier.
Pattern Change (7/2019): I reduced the length of the Side Dish's hook and loop to 8-1/2" from 9". 9" works, but 8-1/2" is easier. :)
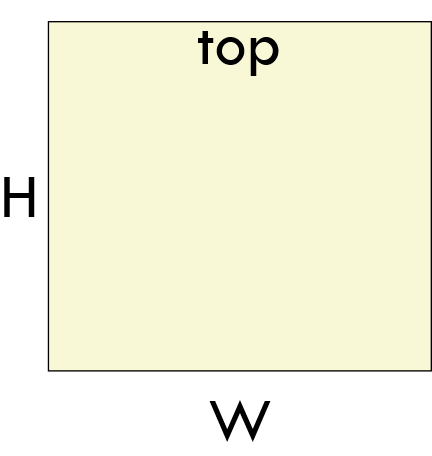
Pay Attention to H (height) and W (width) when cutting out your fabrics.
The cutting instructions have H for height and W for width on all pieces. This will help you if you are using directional prints.
This is also important when sewing the correct sides of pieces together.
Tip: Page 11 has Directional Fabric Tips
If your fabric has a strong directional print, like words or people, the page 11
help will show you how to cut the main pieces in 2 sections and stitch them
back together to have your prints right-side up on the long edges.
Overview of Steps
The most important thing to know is that accuracy really counts when you are making something that has to fit on a frame at the end. So, measure accurately and check your seam allowances.
Also, if you haven't pre-washed your fabrics, use as little steam as possible when fusing to the foam. Sometimes the fabric will shrink the foam and then your tote can be harder to get on the frame at the end. I use a dry iron and mist as needed.
The first thing you will do is cut out the fabrics, foam and stabilizer. I recommend the Bosal In-R-Form double sided fusible foam. I cannot guarantee a different brand will work the same. My favorite stabilizer is SF101 Shape-flex by Pellon.
Once you have cut out the foam, you will mark the crease lines. The crease lines will be stitched which creates a location for the foam to bend and create the sides.
Make sure you don't go over the 2.5" distance for these lines. If you are a little too far towards the middle the whole tote will end up smaller and again, this may make it difficult to get your tote onto the frame in the end. Cut the corners out and fuse fabrics to foam (per instructions in the pattern).
Hook and loop tape - I recommend Velcro brand. You need 8 pieces total. The 1/4" above the hook and loop will end up being the seam allowance when you sew the top bands on. So, try to leave the full 1/4" above the hook and loop.
Handles - These are pretty straight forward. In order to get the required pieces out of a fat quarter, there are 3-4 pieces. I made sure the seams were on the bottom of the tote when I stitched the handles on. Some people are making longer handles for the casserole size and sewing them across the short side so they can carry it with one hand. One day I'll add some info about that. As of today, I haven't played with that modification yet. But I like it!
Attached the handles by pinning them to the outside. I have you mark 2 points opposite each other on the handle and centering those points on the tote. What this does is ensure the handles are exactly the same length on each side. When you stitch them on, stitch from hook and loop on one side to the hook and loop opposite. I stitch an 'X' for strength at each end. Handles are stitched all the way through, so match your bobbin to the inside fabric.
Box Corners.
This is one part I have changed since the very first initial printing. I found just a few people were shrinking the foam enough that their tote was getting smaller. This was making it hard to get on the frame. Since it is easier to change the pattern a little to help avoid this, I did just that.
I added this section in July 2019:
By measuring the distances from the center of the side any shrinkage ends up not changing the dimensions of the tote after boxing the corners. The original pattern told you to use the foam as a guide for where to stitch the box corners. Now you will use the corner of the crease line to the marks. And remember... more is more... be careful not to stitch a little too close to the center. If off... lean to the outside. :)
Make sure you backstitch for strength on all 4 corners.
Top Bands:
The top bands hold the wire frame in place using hook and loop tape. This allows the frame to be removed for washing. I added 1/4" to the length of the top bands to make it even easier to get the frame in place (September 2019).
I added the following extra stitching to the top bands in July 2019:
Backstitch at edges and stitch over each seam twice for extra strength.
The extra stitching makes the seams stronger. Another option you could do is wait to apply the stabilizer to the top bands until after you have stitched them all together. This would allow you to apply the stabilizer over the seams. I would line the seams up with the center of the piece of stabilizer and let the ends overlap slightly where they meet. I won't change the pattern to do this... just something I thought of while writing this.
Once the bands are on the tote, the only thing left to do is to put the tote on the frame. This is ALWAYS a tight fit. The tote is made to fit the inside of the frame. The top bands are pulled over the frame and sealed on the outside. If you have trouble stretching it over, you could try misting the corners to give them a little help stretching. I will do some testing and update this once I have more information to share.
Thanks so much for stopping by and happy sewing!!
Jo
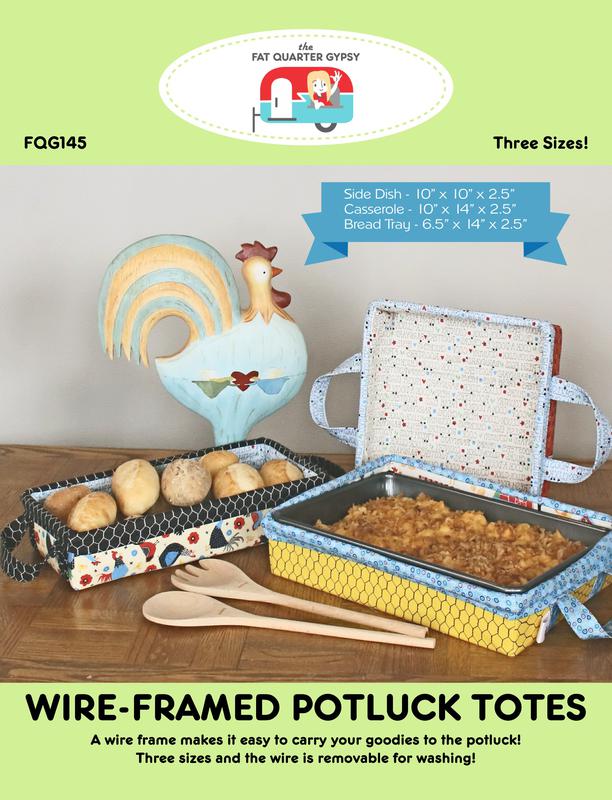
FQG145 Wire-Framed Potluck Totes
Take your dish to the potluck in style!
There is a wire frame at the top to make it sturdy. The frame is held in place with a flap and hook & loop tape. This makes it washable!
Companion Items:
FQG137 Small Tote Frame - for Bread Tray
FQG146 Casserole Tote Frame
FQG147 Side Dish Tote Frame
439-D Bosal Tote Foam
Skill Level: Intermediate